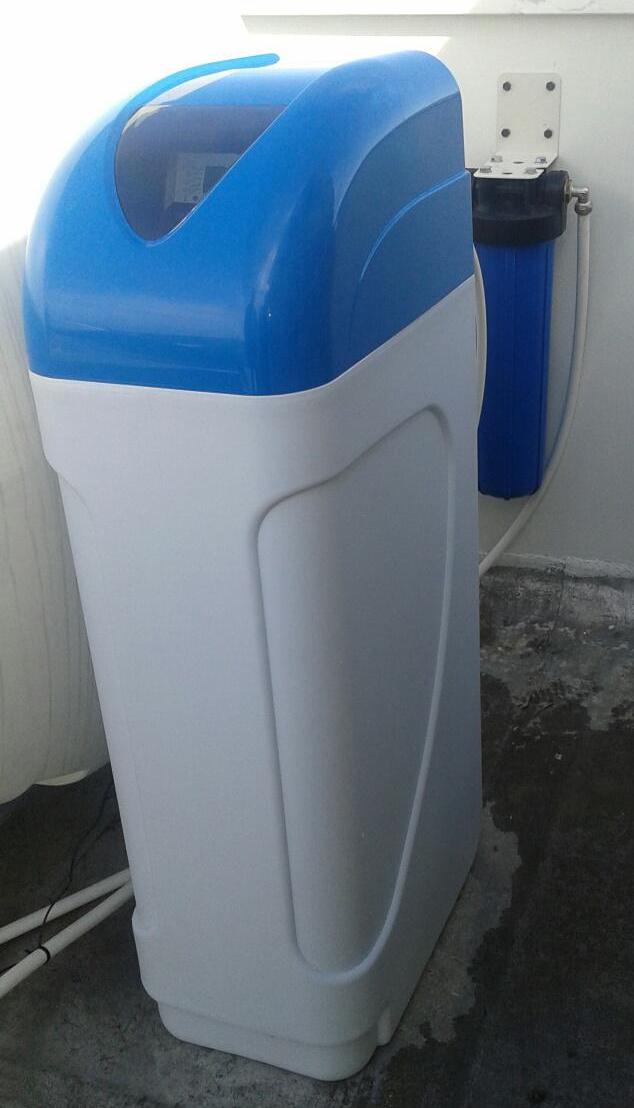
Home Water Softener will provide soft water for every faucet, washing machine, and dishwasher in your house.
Having a complete system is important because we want you to have a worry free system.
Installed at the valve, complete and everywhere you are – Soft water will touch your lives.
Systems that address all water needs are less maintenance than smaller point service systems.
A Point Service System means a Specific Need System. Point service systems will serve just a kitchen or washing room in a commercial building.
Point service systems (often installed in a closet or cupboard) cause considerable damage when they fail or have leaks. Leaks are sometimes not noticed because of these concealed installations. A single, yet complete system is simple to keep stocked with salt and is less annoying when it regenerates.
We Recommend a Home system to be installed in the maintenance room. It is easily accessed by a service technician, and spills or leaks are gathered up by the floor drain.
Benefits of Soft-water….
Soft-water, Whole Home Softeners – give, provide, and fill a home with needed comfort and benefits – removing the grind of living.
Enjoy the fun times – hosting, dinning, laughing, loving…. Friends will wonder what it is that makes it happen for you. As you say good bye, you will close the door to a pleasant evening – and… open the door to your relax time.
You will be having a bath free from soap scum – Free from calcium build-up time is spent loving and living, not scrubbing and shining.
You see, No matter how hard you try you can’t hide mineral calcium. It’s into and onto everything – botching that perfect wine, new glassware, shiny faucets, shiny floors, granite and stone tops, hiding our happiness with embarrassment!
Having a good water softening system is very important as you begin to understand the importance of water treatment. And you can put it in as you are able – filters, softeners, ROs.
Your water heater will last longer and cost you less – off-setting the cost of softener equipment. Soft-water is an effective answer to living a whole home good life.
Water Softener Salt….What is it?
Figuratively speaking – Water Softener Salt can mean Sodium, Potassium, Pellets or Crystals.
Unless you ask questions!
From here on out we will call “salt” – “salt” (Mineral Sodium) which represents crystals in their natural form. I have had people ask me, “can you buy crystals that are condensed like pellets?”. Well…No! Crystals are crystals! – nature made them that way!
Sodium Ions make the water soft, but… some people have been restricted to Low Sodium or Sodium Free diets.
So, you have two choices – 1. Use Potassium. or 2. Put in a Reverse Osmosis system and use it for drinking and cooking.
We recommend the second choice as Potassium is a bit more expensive. RO units, as we call them, filter all the sodium out of the soft water and leave you with water used by huge brands like Coca Cola for their water needs.
After understanding Sodium and Potassium, we have the choice of using pellets or crystals. Pellets do last longer, but often form hard crusts in the brine tank.
I stick with salt crystals and the RO unit – it is simplest and performs best for me!
You choose for you!
Water Softener Regeneration…..
Water Softener Regeneration….Inside your softener are resin beads – these little beads create the surface area for suspension, or swapping.
The beads recharge through the night with sodium ions, then release soft ions into your home. Hard water ions hold onto the surface of the little beads. As water passes through – the millions of resin beads keep the dirty ions with them.
When the timer says you have used the amount of soft ions it can produce with one cycle (and this is based on the hardness of the water that you are currently using) it again charges the bed of beads in preparation for water usage.
Our technician can find out how hard your water is. Then he can set the control valve in preparation for when the capacity of the ion exchange is used.
The technician is thinking for the softener (or calculating the needed information and then entering it into the softener’s mind).
 You can buy a unit with a sensing meter that senses (by electrical current) the calcium or gunk-ion build up on the resin beads. This is our best selling water softener, which comes with a Pentair volumetric head that can be programmed for easy regeneration.
Recommendation – use the sensor if your water is mild for hardness. If you have to get serious, do the math and make sure the system will work for you.
Your system will work for years without needing any help. View the other recommendations and systems that are preferred, we want this site to benefit and educate all.
Remember – It is important that the brine tank not run out for long periods of time, it is very hard on your water softener and your home plumbing system.
We will install the water softener for you
But in case you prefer to do it by your self below are instructions to follow:
How to Install a Water Softener
Hoping you have taken some time to find the softener system that meets your needs, let’s proceed with “How to install a water softener”.
A few general terms: Water Softener loop – the water line that comes out of the wall and then goes back in. (This is the main water line of the home) Pex – standard plastic water pipe. (You may find copper in older homes, copper will need soddering)
Crimp ring – rings that attach pex and fittings together. Crimps – a plier looking lever tool that crunches crimp rings. Pex cutters – usually “red”, mechanically cut the pex as you squeeze them.
Drain line – plastic drain pipe (Normally about 1.5 inches, like under a sink. May be black or white.) It will be sticking out of the wall just below the softener loop.
If not, you will put the regeneration pex line near a floor drain to accommodate the “back-wash” cycle.
We are on our way to understanding how to install a water softener. We have talked about the “softener-loop” which is the main for the whole home and the drain line or floor drain that we will use.
If you cannot find a “softener-loop” just remember that your focus is to install the softener in the main line so that all the water goes through your softener and then to your water heater and other appliances and faucets.
You will now make sure you have floor and wall space to place the system (tank(s), valve, brine tank). Then make sure you have a power source.
Look at what you have purchased, make sure everything is there. (Read the Manual) Do not begin until you understand what each part is and the plumbing layout you will use. (ie. how it will go together)
You are ready to start if you have completed everything lined out so far. Have you identified all your tools? Have you identified the size of line you are working with, and the size of pex rings, and crimps you will need (the rings will barely slip over the pex).
Now you will shut off the main water valve to the whole home (this is the same water valve the serving utility turns on when they come to turn on your water).
Next, open a faucet in the home and then open a hose bib on the outside (or a faucet in the basement, this will drain the line of any pressure)
Once the pressure is off, you are ready to cut the line, elbow over to the inlet side of the valve (head) on the softener and then elbow from the outlet side of the softener valve back to the main going to the home plumbing system. (you will need something to catch some water in, and you may get a little squirt!)
It’s all good, you are a plumber right! You are learning how to install a water softener!
If you understand that the water has to go from the main through your softener and back into your home plumbing system you are on your way. Read the instructions for putting the resin into the tank(s) (they are very tiny, light beads, so keep them out of your face.)
Then you will hook up the tank and valve, set the brine and back-wash line, and put salt in the brine tank. Follow the instructions sent with the system, as every system is a little different.
Hook it all together, cutting, crimping, and then plug it in and set the computer settings. After everything is set and you have double checked your schematic for plumbing, then you are ready to do a “water tight test” by turning on the main valve and checking your fittings for leaks. (If there are any, go as explained above and shut off the water, clip and re-tighten, or re-crimp).
Be prepared to set aside a morning or an afternoon. Mornings are better because it gives you the complete day, should you need to run for more parts.
Every system is different, we hope you are closer to knowing how to install a water softener. You must read and follow the manufactures instructions. This is only meant to inform, never guarantee. We wish you success with your installation.
Related Links:
Water Softener Parts
Water Softener Systems
The benefits of using shower water filter systems
What are the real differences between salt softened water and water from The whole house water conditioner?

Stavros is a professional water quality specialist and holds an extensive knowledge of various water filtration technologies, including reverse osmosis, water softeners, water purification systems and additional water treatment techniques for residential and commercial use. He has written extensively on the subject of water filtration and treatment, with his work appearing in industry publications such as Water Technology and Water Quality Products.
In addition to his professional work, Stavros supports the environmental sustainability and is committed to promoting eco-friendly water filtration solutions. He believes that everyone has to have access to clean, safe drinking water and is dedicated to helping people achieve this goal.
Stavros resides in Larnaca Cyprus with his family and enjoys sailing. He can be reached at tel: +357 99626069 and is available to provide expert advice on all aspects of water filtration systems, including installation, maintenance, and replacement filters.
- How do you use SodaStream Duo – Step by Step Guide? - February 6, 2024
- Why Choose Tankless Systems? Discover the Best Tankless Reverse Osmosis Systems in Cyprus - December 18, 2023
- Comparison of Chlorine vs Chlorine Dioxide: Which is the Superior Sanitizer? - June 25, 2023